Camellia
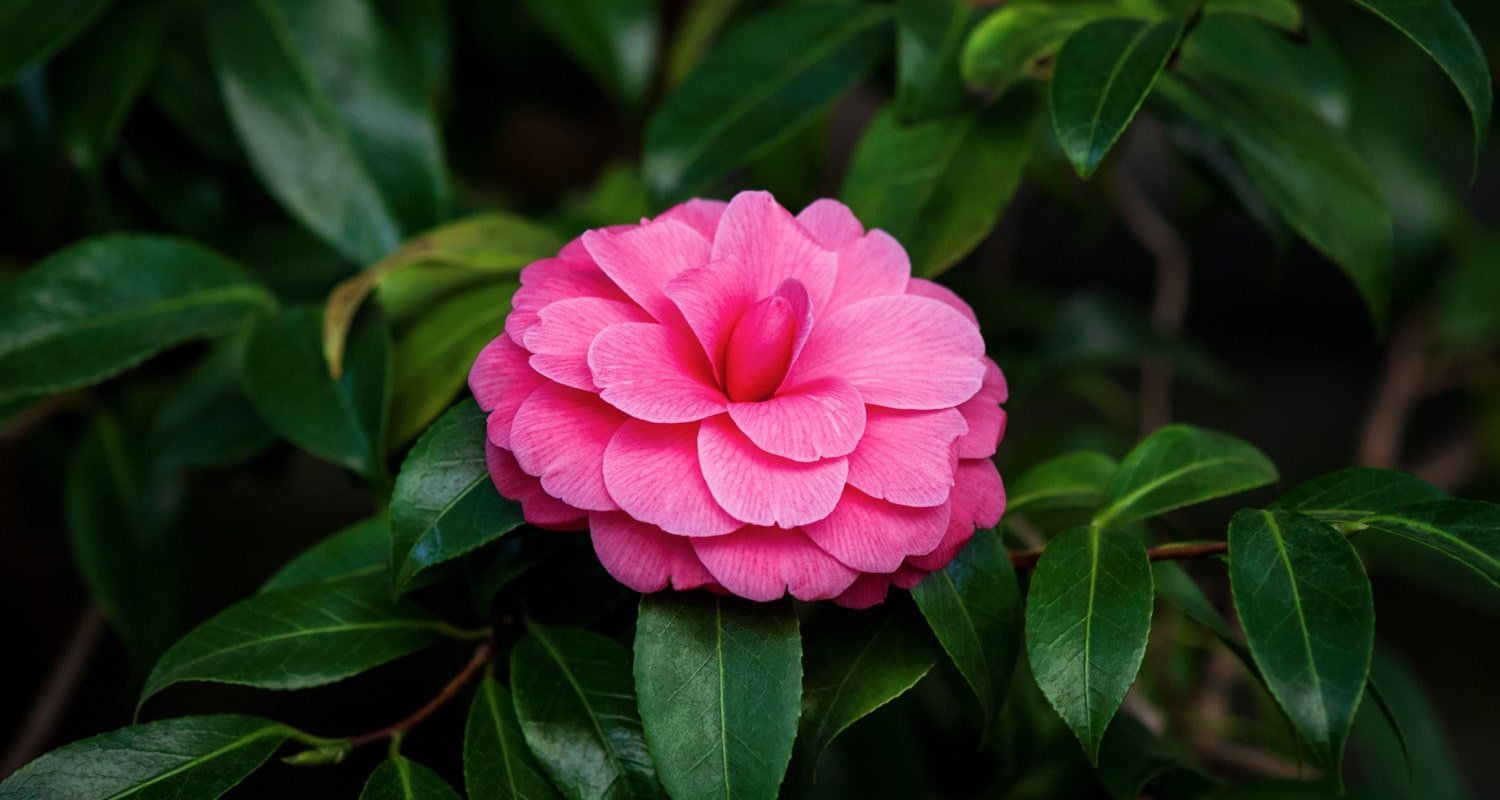
Camellia, scientifically named Camellia japonica, is a beautiful flowering plant native to Asia. They are highly valued for their spectacular blooms, which come in various colours, including pink, red, white, and even yellow. Camellias are evergreen plants with glossy, dark-green leaves that provide year-round interest in the garden. They are popular ornamental plants that can be grown in pots or on the ground and are often used in landscapes, hedges, or as garden specimen plants.
- Appearance
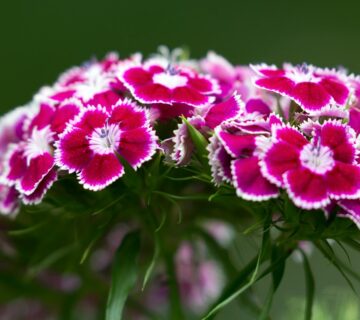
Camellia plants have a distinct appearance characterised by their dark green, glossy leaves and large, showy flowers. The leaves are typically oval-shaped and pointed, with a smooth texture and a shiny surface. The flowers are the plant’s main attraction and come in various colours, including white, pink, red, and even yellow. The flowers are typically large and showy, with multiple layers of petals that form a round shape. The centre of the flower is usually filled with stamens and pistils, which give it a distinctive look. Overall, Camellia plants are elegant and refined, making them famous for indoor and outdoor gardens.
Plant Size
Camellia plants come in various sizes, from small shrubs to medium and large trees. Here are the main size categories of camellias:
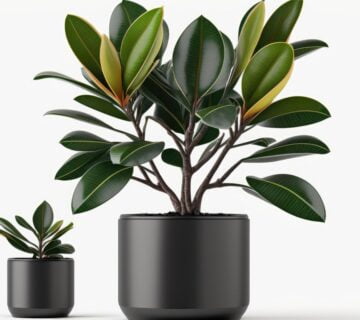
• Dwarf camellias: These stay under 3 feet tall and make excellent container plants. They have compact growth and smaller leaves.
• Shrub camellias: The most common type, grows in a rounded shrub form from 3 to 8 feet tall and wide. They make significant foundation plantings and hedges.
• Medium camellias: These can grow from 8 to 15 feet tall. They have an upright shrub form.
• Tree camellias: The largest type, tree camellias can grow up to 30-40 feet tall and have a single-trunk tree form. They often take 10-15 years to reach their mature size.
A camellia plant’s size depends on factors like the specific variety, soil conditions, amount of light, and pruning. In general, larger camellia varieties with thicker stems tend to grow taller, while the dwarf and mini varieties remain more compact. According to Feng Shui, It brings Good fortune and wealth.
Flower Size
The size of a camellia flower can vary depending on the variety and growing conditions. Generally speaking, camellia flowers can range in size from about 2 inches (5 cm) in diameter for some smaller types up to 5-6 inches (12-15 cm) for larger varieties. Some cultivars may produce even larger flowers under ideal growing conditions.
- Variety
There are many species of Camellia, some of which are commonly cultivated for their ornamental value, while others are prized for their commercial uses. Here are some examples of Camellia species:
Camellia japonica: This is one of the most common species of Camellia, known for its large and showy flowers. It is native to Japan and Korea.
Camellia sasanqua: This species is also native to Japan and is known for its smaller, fragrant flowers that bloom in the fall.
Camellia sinensis: This is the Camellia species used to produce tea. It is native to China but is now cultivated in many other countries.
Camellia reticulata: This species is known for its large, colourful flowers that can reach up to 12 inches in diameter. It is native to China.
Camellia oleifera: This species is prized for the oil extracted from its seeds, used in cooking and cosmetics. It is native to China.
Camellia hiemalis: This species is a hybrid between Camellia japonica and Camellia sasanqua and is known for its early blooming period in the winter. It is native to Japan.
Each species has many cultivars developed for their unique characteristics, such as flower colour, size, shape, and bloom time. In addition, many hybrid camellias have been developed by crossing different species or cultivars. The number of camellia varieties and hybrids constantly evolves as plant breeders grow new and unique plants.
- Light Requirements
Camellia plants prefer bright, indirect light. They can tolerate some direct sunlight in the morning or late afternoon, but direct sunlight during midday can damage the leaves. It’s best to place Camellia plants where they can receive morning or late afternoon sun but are shaded during the hottest part of the day.
Camellias should be placed near a window that receives bright, indirect light for most of the day if grown indoors. Camellia plants produce fewer flowers in low light conditions and may develop leggy growth. If your Camellia is not blooming as much as it should, it may be a sign that it’s not receiving enough light. In this case, you may need to move the plant to a brighter location or supplement its light with artificial lighting.
- Temperature
Camellia plants prefer cool temperatures and can be sensitive to extreme heat. During the growing season, Camellias prefer daytime temperatures between 60 and 70 degrees Fahrenheit (15-21 degrees Celsius) and nighttime temperatures between 50 and 60 degrees Fahrenheit (10-15 degrees Celsius).
Protecting Camellia plants from direct sunlight and hot, dry air is essential in the hot summer months. If temperatures rise above 80 degrees Fahrenheit (27 degrees Celsius), Camellias may show signs of heat stress, such as wilting or leaf drop. Moving the plant to a more fantastic location or providing shade during the hottest day is best.
Camellias can tolerate occasional frost in colder months, but prolonged exposure to freezing temperatures can damage the plant. Suppose you live in a region with cold winters. In that case, protecting your Camellia from freezing temperatures is essential by covering it with a frost cloth or moving it indoors.
- Humidity
Camellia plants prefer cool temperatures and can be sensitive to extreme heat. During the growing season, Camellias prefer daytime temperatures between 60 and 70 degrees Fahrenheit (15-21 degrees Celsius) and nighttime temperatures between 50 and 60 degrees Fahrenheit (10-15 degrees Celsius).
Protecting Camellia plants from direct sunlight and hot, dry air is essential in the hot summer months. If temperatures rise above 80 degrees Fahrenheit (27 degrees Celsius), Camellias may show signs of heat stress, such as wilting or leaf drop. Moving the plant to a more fantastic location or providing shade during the hottest day is best.
Camellias can tolerate occasional frost in colder months, but prolonged exposure to freezing temperatures can damage the plant. Suppose you live in a region with cold winters. In that case, protecting your Camellia from freezing temperatures is essential by covering it with a frost cloth or moving it indoors.
Camellias prefer moderate to high humidity levels, which can help them thrive and produce healthy foliage and blooms. Here are some guidelines for maintaining appropriate humidity levels for camellias:
1. Indoor Camellias: If you have indoor camellias, you may need to increase the humidity levels in your home, especially during the winter when the air is dry. You can use a humidifier or place a water tray near your plants.
2. Outdoor Camellias: If you have outdoor camellias, you may not need to worry as much about humidity, as the natural humidity levels in your area can often be sufficient. However, if you live in a dry climate, you can increase humidity levels by regularly misting your plants with a fine water spray.
3. Ideal Humidity: Camellias prefer humidity levels between 50-60%, although they can tolerate lower levels if necessary. High humidity levels can increase the risk of fungal diseases, so it’s important to avoid overwatering and ensure good air circulation around your plants.
4. Humidity and Temperature: Keep in mind that humidity levels can be affected by temperature, with higher temperatures generally leading to lower humidity levels. If you live in a hot climate, you may need to take extra steps to maintain appropriate humidity levels for your camellias.
Overall, camellias can benefit from moderate to high humidity levels, but it’s essential to balance this with proper watering and good air circulation to prevent fungal diseases. By paying attention to these factors, you can help your camellias thrive.
- Hardiness Zones
Camellia plants are generally hardy in USDA Hardiness Zones 7 to 9, which cover most of the southern and southeastern United States. Camellias can be grown as outdoor landscape plants in these zones and tolerate mild winter temperatures.
Camellias can also be grown as outdoor plants in colder regions, but they may require some protection from freezing temperatures. In USDA Hardiness Zones 6 and below, Camellia plants may need to be grown in containers and brought indoors during winter to protect them from frost and cold temperatures.
It’s important to note that many varieties of Camellia plants exist, and some may be more cold-hardy than others. Suppose you must decide whether a particular Camellia variety suits your area. In that case, it’s a good idea to consult a local nursery or gardening expert for advice on the best plants to grow in your climate.
- Watering
Camellias are beautiful flowering shrubs that require a consistent and appropriate watering regimen to thrive. Here are some guidelines for watering camellias:
1. Frequency: Camellias should be watered deeply and regularly, especially during the growing season, typically from late winter to early spring. In general, camellias must be watered about once a week or more often during hot and dry weather.
2. Amount: Water camellias deeply to ensure the water reaches the roots. Applying at least one inch of water per week is a good rule of thumb. However, be careful not to overwater, as camellias dislike sitting in waterlogged soil.
3. Timing: Water camellias early in the day so the foliage can dry before evening. This can help prevent fungal diseases that can occur in moist conditions.
4. Soil: Camellias prefer well-draining soil that retains moisture. If your soil is heavy and clay-like, consider adding organic matter, such as compost, to improve drainage.
5. Mulching: Adding a mulch layer around your Camellia’s base can help retain moisture and regulate soil temperature. Use a layer of organic materials, such as pine bark or leaves, to a depth of around 2-3 inches.
Overall, consistent watering is key to maintaining healthy camellias. By following these guidelines, you can ensure your camellias receive the appropriate amount of water to thrive.
- Soil
Camellias prefer well-draining, slightly acidic soil that is rich in organic matter. Here are some guidelines for selecting and preparing soil for camellias:
1. pH: Camellias prefer soil with a pH between 5.0 and 6.0. If your soil is too alkaline (pH above 7.0), you may need to amend it with sulfur or other acidifying agents.
2. Drainage: Camellias do not like to sit in waterlogged soil, so it’s essential to ensure good drainage. If your soil is heavy and clay-like, consider adding organic matter, such as compost or peat moss, to improve drainage.
3. Organic matter: Camellias benefit from soil rich in organic matter, which can help retain moisture and provide essential nutrients. Add organic matter to your soil by incorporating compost, leaf mould, or well-rotted manure.
4. Soil structure: Camellias prefer loose and friable soil, which allows for good root growth and drainage. If your soil is compacted, you may need to aerate it or add sand to improve its structure.
5. Mulching: Adding a layer of organic mulch, such as pine bark or leaves, around the base of your camellias can help retain moisture and regulate soil temperature. Apply the mulch to a depth of around 2-3 inches, but keep it away from the stems of your plants to prevent rotting.
Overall, selecting and preparing suitable soil is essential for the health and growth of your camellias. By paying attention to factors such as pH, drainage, organic matter, soil structure, and mulching, you can create an ideal growing environment for your plants.
- Fertilization
Fertilizing camellias is essential to their care, as it can help promote healthy growth and abundant blooms. Here are some guidelines for fertilizing camellias:
1. Timing: Camellias should be fertilized in the spring after the blooms have faded. Avoid fertilizing in the fall or winter, as this can encourage new growth vulnerable to cold damage.
2. Type of fertilizer: Camellias prefer a balanced fertilizer with equal amounts of nitrogen, phosphorus, and potassium (such as a 10-10-10 or 12-12-12 fertilizer). Look for a fertilizer containing micronutrients such as iron, manganese, and zinc, essential for camellia health.
3. Application rate: Apply the fertilizer according to the package instructions, being careful not to over-fertilize, as this can lead to salt buildup and damage to the roots. As a general guideline, apply 1/2 to 1 cup of fertilizer per 100 square feet of planting area.
4. Method of application: Apply the fertilizer evenly over the soil surface, being careful not to get it on the leaves or stems of the plant. Water the plants thoroughly after fertilizing to help the fertilizer soak into the soil.
5. Organic fertilizers: If you prefer organic fertilizers, look for products such as compost, bone meal, or fish emulsion. These can provide the necessary nutrients for camellias but may need to be applied more frequently than synthetic fertilizers.
Overall, fertilizing camellias can help keep them healthy and blooming. By following these guidelines for timing, type of fertilizer, application rate, method of application, and organic options, you can provide your camellias with the nutrients they need to thrive.
- Pruning
Pruning camellias is essential to their care, as it can help promote healthy growth, control their size, and improve their overall appearance. Here are some guidelines for pruning camellias:
1. Timing: The best time to prune camellias is after they have finished blooming, typically in the late winter or early spring. Avoid pruning in the fall or winter, as this can remove next year’s flower buds.
2. Type of pruning: Camellias can be pruned for various reasons, such as to control their size, shape or to remove dead or diseased wood. Depending on your goals, you may want to consider one or more of the following types of pruning:
– Pinching: This involves removing the tips of new growth to encourage bushier growth.
– Thinning: This involves selectively removing branches to improve air circulation and light penetration.
– Heading back: This involves cutting back the tips of branches to encourage lateral growth.
– Renovation pruning: This involves more drastic pruning to rejuvenate an old or overgrown plant.
3. Tools: Use sharp, clean pruning shears or loppers to make clean cuts and avoid damaging the plant.
4. Technique: Make cuts just above a leaf node or bud, and avoid leaving stubs or cutting into healthy wood.
5. Clean-up: Remove any dead or diseased wood and any debris or fallen leaves around the base of the plant to help prevent the spread of disease.
Overall, pruning camellias can help keep them healthy and attractive. By following these guidelines for timing, type of pruning, tools, technique, and clean-up, you can help your camellias thrive and look their best.
- Propagation
Camellias can be propagated through several methods, including cuttings, layering, and grafting. Here are some guidelines for propagating camellias:
1. Cuttings: Camellias can be propagated from stem cuttings in mid-to-late summer. Select a healthy, non-flowering stem with several leaves and make a clean, diagonal cut just below a node. Remove the lower leaves and dip the cut end in the rooting hormone. Plant the cutting in a well-draining soil mix and keep it moist and out of direct sunlight until it roots.
2. Layering: Camellias can also be propagated through layering, which involves bending a low-hanging branch to the ground and burying a section of it in the soil. Please make a small cut on the underside of the branch where it touches the soil to promote rooting and keep the soil moist until roots develop. Once roots have formed, cut the branch from the parent plant and transplant it to its new location.
3. Grafting: Camellias can also be propagated through grafting, which involves joining a cutting or scion from one plant onto the rootstock of another plant. This method can be more complicated and requires some specialised knowledge and skills.
4. Timing: Propagation is best done during the growing season when the plants are actively growing and have the best chance of rooting or grafting successfully.
5. Care: After propagating camellias, it’s essential to provide proper care, including regular watering, fertilizing, and protection from pests and diseases.
Overall, camellias can be successfully propagated through cuttings, layering, or grafting, depending on your skill level and available resources. Following these guidelines, you can propagate new camellias to add to your garden or share with others.
- Repotting
Repotting a camellia plant is typically done in the spring after the plant has finished blooming. Here are the steps to follow for repotting a camellia:
- Choose a new pot that is slightly larger than the current one. Make sure it has drainage holes in the bottom.
- Fill the bottom of the new pot with fresh, well-draining soil mix. A good soil mix for camellias is rich in organic matter, slightly acidic, and well-draining.
- Gently remove the camellia from its current pot, carefully not damaging the roots. If the plant is root-bound, use a sharp knife or pruning shears to lightly score the roots along the sides and bottom of the root ball.
- Place the camellia in the new pot, ensuring it is centred and at the same depth as in its previous pot.
- Fill in around the sides of the root ball with fresh soil mix, gently pressing down as you go to eliminate air pockets.
- Water the camellia thoroughly and place it in a shaded area for a few days to help it adjust to its new pot.
- After a few days, move the camellia to its usual growing location, ensuring it receives the appropriate amount of sunlight and water.
It’s important to note that camellias don’t like to be disturbed too much, so it’s best to avoid repotting them too often. Typically, camellias can be repotted every 2-3 years or when outgrown their current pot.
- Dormancy
Camellias go through a period of dormancy during the winter months when they slow down their growth and conserve their energy for the spring. Here are some guidelines for managing camellia dormancy:
1. Timing: Camellias typically dormant in the late fall or early winter after their blooming season. This natural process helps the plants survive cold temperatures and winter weather.
2. Watering: During dormancy, camellias require less water than during their active growing season. Allow the soil to dry out slightly between waterings, but do not let it dry out completely.
3. Fertilizing: Camellias should not be fertilized during dormancy, which can encourage new growth vulnerable to cold damage.
4. Pruning: Camellias should be pruned after they have finished blooming but before they go into dormancy. Avoid pruning during dormancy, as this can remove next year’s flower buds.
5. Protection: During cold weather, camellias may benefit from protection such as mulching or covering with a frost cloth. Be sure to remove any coverings once the weather warms up to prevent the plants from overheating and drying out.
Overall, managing camellia dormancy is essential to their care, as it can help ensure their health and vitality for the coming growing season. Following these watering, fertilizing, pruning, and protection guidelines can help your camellias survive the winter and thrive in the spring.
- Care
Camellia flowers are beautiful, evergreen flowering shrubs that bloom in the fall, winter, and early spring. Here are some tips for caring for camellia flowers during the different seasons:
Spring:
- Prune your camellia after it finishes blooming in the spring. This will help control the size and shape of the plant.
- Fertilize your camellia with a slow-release balanced fertilizer for acid-loving plants to encourage growth and flowering.
- Water regularly, especially if there is little rainfall.
Summer:
- Provide shade during the hottest parts of the day to protect the flowers from excessive heat and sunburn.
- Water your camellia deeply during the summer, especially in a hot and dry climate. Camellias prefer moist soil and don’t like to dry out.
- Mulch around the base of the plant to help retain moisture and keep the soil cool.
Fall:
- Camellias typically bloom in the fall, so enjoy the beautiful flowers!
- Stop fertilizing and reduce watering as the weather cools down.
- Prune the plant after blooming to control its shape and encourage growth for next year’s blooms.
- Watch for pests like scale insects and spider mites, common in the fall.
Winter:
- Protect your camellia from cold temperatures and frost. Cover the plant with a frost cloth, or move container-grown camellias to a protected area.
- Avoid pruning your camellia in the winter, as this can stimulate new growth that cold temperatures may damage.
- Reduce watering to prevent root rot.
Overall, camellias are relatively low-maintenance plants that require regular water, some fertilizer, and protection from extreme temperatures.
- Common Pests and Problems
Camellias can be affected by various pests and problems, including fungal diseases, insect infestations, and environmental stressors. Here are some common pests and problems that can affect camellias and how to manage them:
1. Camellia Scale: This insect can cause yellowing leaves, dieback, and reduced vigour. Scale insects can be managed by spraying the plant with horticultural oil or insecticidal soap or using a systemic insecticide.
2. Camellia Bud Blight: This fungal disease can cause buds to turn brown and fail to open. It can be managed by removing infected buds and using a fungicide spray.
3. Camellia Leaf Spot: This fungal disease can cause brown spots on the leaves and premature leaf drop. It can be managed by removing infected leaves and using a fungicide spray.
4. Camellia Petal Blight: This fungal disease can cause flowers to turn brown and fall off prematurely. It can be managed by removing infected flowers and using a fungicide spray.
5. Camellia Dieback: This can be caused by various factors, including drought, winter damage, or fungal infections. It can be managed by pruning back affected branches to healthy wood and improving the plant’s growing conditions.
6. Environmental Stress: Camellias can be stressed by extreme heat or cold, drought, or poor soil conditions. Ensure that your camellias are planted in well-draining soil, receive adequate water and nutrients, and are protected from extreme weather conditions.
By monitoring your camellias for signs of pests and problems and taking appropriate action to manage them, you can help ensure your plants remain healthy and beautiful.
Leaf and Bud Drops
Various factors, including environmental stress, cultural problems, pests, and diseases, can cause camellia bud and leaf drops. Here are some solutions to common causes of camellia bud and leaf drops:
Temperature stress: Camellias are sensitive to extreme temperatures, especially during the bud stage. Protect the plants from cold drafts and keep them in a climate-controlled environment.
Overwatering: Camellias prefer moist, well-draining soil, but they do not like to be overwatered. Ensure the soil is not too wet, which can cause root rot, leaf and bud drops.
Underwatering: On the flip side, underwatering can also cause leaf drop. Ensure your camellia receives enough water, especially during hot and dry periods.
Nutrient deficiencies: Camellias require a balanced, slow-release fertilizer to thrive. Ensure the plants receive adequate nutrition, especially during the growing season.
Pests: Pests that can cause camellia bud drop include spider mites, scale insects, and aphids. Treat the plant with an appropriate insecticide or insecticidal soap to control the infestation.
Diseases: Camellias can be susceptible to fungal infections like bud rot and canker, which can cause bud drop. Remove any affected buds and treat the plant with a fungicide if necessary.
Cultural problems: Camellias thrive in acidic soil with a pH range of 5.0 to 6.5, but if the soil becomes too alkaline, it can lead to nutrient deficiencies and result in bud and leaf drops. Testing the soil pH and adjusting it with an appropriate amendment is essential to ensure the plants are not stressed. Additionally, factors such as sun exposure and improper pruning should be taken into consideration and managed properly to maintain the plant’s health.
It’s important to note that a certain amount of bud and leaf drops is normal for camellias, especially if the plant is experiencing stress or is not receiving proper care. However, if you notice excessive bud and leaf drops or other signs of stress, it’s best to investigate the cause and take action as needed.
- Toxicity
Camellias are not considered toxic to humans, pets, or livestock. Camellia leaves, and flowers have been used in traditional medicine for their antioxidant and anti-inflammatory properties. However, it’s still important to exercise caution when handling camellias, as some people may be allergic to the plant’s pollen or sap. In addition, while camellias are not toxic, some pesticides or fertilizers used on them may be harmful if ingested or mishandled. It’s always a good idea to follow the manufacturer’s instructions carefully and to wear protective clothing and gloves when working with chemicals. If you have any concerns about the safety of camellias or their care, consult a gardening professional or healthcare provider.
- Air Purifying Qualities
Camellias are not typically considered air-purifying plants, as they cannot remove significant amounts of pollutants from the air. However, like all plants, camellias produce oxygen as part of their photosynthesis process, which can help improve air quality. Additionally, plants in indoor or outdoor spaces can positively affect overall well-being and mental health. While camellias may not be the most effective air purifiers, they can still provide a beautiful and calming presence in your home or garden. If you are specifically looking for plants with air-purifying qualities, many other species, such as spider plants, peace lilies, and snake plants, are known to be effective.
- Luckey plant
In some cultures, camellias are considered lucky plants that bring good fortune and wealth. In particular, the red Camellia is often associated with good luck and prosperity. In Japan, the Camellia is known as the “Tsubaki, “symbolising love and devotion. In China, Camellia is associated with the Chinese New Year and is believed to bring good luck and happiness. While no scientific evidence supports the idea that camellias are lucky plants, they are undoubtedly beautiful and can bring joy and positivity to any space. If you believe in the power of plants to bring good fortune, a camellia may be a lovely addition to your home or garden.
- Uses
1. Ornamental plants: Camellias are popular due to their beautiful flowers, ranging from white to pink to red. They are often used as garden specimens, hedges, or screens to provide privacy and beauty.
2. Cut flowers: Camellias make excellent cut flowers, with blooms lasting up to several days when cut and placed in water. They are often used in floral arrangements for their delicate beauty and long-lasting quality.
3. Tea production: The leaves of Camellia sinensis, also known as the tea plant, are used to produce tea. The leaves are harvested, dried, and then processed to create different types of tea, including green tea, black tea, and oolong tea.
4. Essential oils: Camellia oil, extracted from the plant’s seeds, is a popular ingredient in cosmetics and skin care products due to its moisturising and anti-ageing properties. It is often used in facial oils, serums, and moisturisers.
5. Traditional medicine: Camellia leaves and flowers have been used in traditional medicine for their antioxidant and anti-inflammatory properties. They are often brewed into tea or used as a poultice to treat various ailments, such as inflammation, infections, and respiratory issues.
6. Bonsai: Camellias can be trained as bonsai trees, creating miniature versions of the larger plants. Bonsai camellias require careful pruning, wiring, and shaping to create their unique form, but they can be a beautiful and rewarding addition to any bonsai collection.
7. Landscape design: Camellias can be used in various ways, such as in mass plantings, as a focal point in a garden bed, or as a container plant. They are also suitable for use as espaliers, where they can be trained to grow flat against a wall or fence.
8. Culinary uses: While the leaves of Camellia sinensis are used to make tea, the flowers of some camellia species are also edible and can be used to decorate cakes or salads. Camellia japonica, for example, has edible flowers that can be used in cooking.
9. Dyeing: Camellia flowers can create natural dyes for fabrics, yielding colours from pink to red to yellow.
10. Symbolism: Besides being considered lucky plants in some cultures, camellias have symbolic meanings. In the language of flowers, red camellias are often associated with love and passion, while white camellias are associated with purity and innocence.
11. Hybridisation: Camellias are a popular choice for hybridisation, resulting in a wide range of cultivars with different flower colours, sizes, and shapes. This has led to the developing of many new and unique varieties of camellias.
Overall, camellias are versatile plants with many uses, from their beauty as ornamental plants to their practical applications in tea production, skincare, and traditional medicine. Whether you are a gardener, tea lover, or skincare enthusiast, there is likely a way to enjoy camellias’ many benefits.
Camellia plants are a highly desirable choice for gardens and landscapes, rating 4 out of 5 stars. With their beautiful flowers, year-round foliage, and relatively low maintenance requirements, they are a great addition to any outdoor space.
Things to know about Camellia
Common (vernacular) Name
कैमेलिया (Hindi), Camellia, Common Camellia, Japanese Camellia, Peony Camellia, and many more.
Botanical Name
Camellia
Origin
Native to Eastern and southern regions of Asia, from the Himalayas east to Japan and Indonesia.
Family
Theaceae
Plant Type
Tropical plant
Plant Features
Ornamental / Evergreen / Exotic
Life Cycle
Perennial
Landscape Uses
Container, Garden beds and borders, Hedges and screens and Houseplants.
Species
There are more than 220 described species.
Varieties
It comes with more than 3000 varieties in various leaf and flower colourations. Some are Camellia sasanqua, Camellia japonica, Camellia sinensis, Camellia x williamsii, Camellia reticulata, Camellia oleifera, Camellia chrysantha etc.
Size
Height: 6 to 15 feet tall
Width: 5 to 7 feet wide
Indoors or Outdoors
Outdoors : Anthurium can be used outdoors in shady plantings; avoid direct sunlight.
Indoors : Excellent plant growth in bright light or indirect light. Best indoor plants for beginners.
Blooming / Flowering
The blooming period is throughout the year.
Flower Colour
Pink, White, Pink, Red and Yellow.
Lucky Plant
According to Feng Shui, It brings Good fortune and wealth.
Lighting / Sun Exposure
Bright Indirect Sunlight.
Temperature
Grow best in warm temperatures above 10°C and tolerate max temp. as high as 21°C.
Growth Rate
Fast growing
Watering
Moderate watering, Mist or overhead sprinkler to provide water and to improve relative humidity. Do not tolerate overwatering, It can cause root damage and leaf yellowing.
Fertilizer
Applying slow-release fertilizer or a water-soluble liquid fertilizer once or twice during the growing season (from spring to summer) is recommended.
i.e., - Cow dung, DAP, Compost, NPK 30-10-10 fertilizer, liquid organic fertilizer etc.
Pruning
Pruning of Anthurium, little is needed. However, trimming away only discoloured or dead leaves.
Propagation
Seeds : The best time to sow your Anthurium seeds is at the end of Winter / early Spring, but it can't give good results.
Stem Cuttings : The easier propagation methods of Anthurium in water or soil via stem cuttings can be done during the warm growing season.
Division : The division of Anthurium can be done in the Rainy season or, better, from February to March.
Dormancy Period
Month : November to February (winter season)
Shed their leaves and show poor growth, Watering minimally.
Avoid : Propagate, Fertilize and Repotting.
Container
Ceramic Pot, Plastic Pot, Terracotta or Clay Pot is preferred, which ensures good drainage and water holding capacity.
Soil Type
A well-drained Loam / Coarse potting soil and water-holding capacity are recommended. Prevent soggy potting medium.
Our recommendation for the potting mix: Equal part mixture of Garden Soil (25%) + Compost (25%) + River Sand (25%) + Cocopeat (25%). You can substitute pieces of Charcoal, Vermicompost, Perlite etc.
Soil pH
Lightly Acidic soil - Ideally, 5.5 to 6.5 pH (potential of hydrogen) is recommended for Anthurium.
Repotting
It is advisable to repot the Anthurium every year or two, preferably during the spring to midsummer season.
Maintenance
Low maintenance and easy to grow.
Properties
The plant poses toxicity risks to both humans and pets if ingested.
Benefits
Excellent indoor air purifier, Anthurium plants turn CO2 into oxygen. It purifies indoor air by removing harmful chemicals like ammonia, toluene, xylene and formaldehyde.
Special Features
It does not attract hummingbirds and pollinators in the same way it does butterflies, bees, or wasps.
Infestation / Pests
Aphids, Scale insects, Thrips, Mealybugs, Spider mites, caterpillars etc.
Diseases / Problem
Physiological Problem : Anthracnose, Leaf Spot and Powdery Mildew.
Bacterial Problem : Bacterial Blight, Bacterial Wilt and Black Nose Disease.
Fungal Problems : Root Rot and Water Mold.
In conclusion, Vinca or Sadabahar plants are prized for their beautiful flowers, easy maintenance, and versatility in various garden settings. With their vibrant colours, heat tolerance, and ability to attract pollinators, they can bring joy and visual interest to any garden or landscape.
No comment